
1991 – Doctor Who: Deadly Alliance
Coco3 (disc)
Programmer: Mike Snyder (aka T&D Software) [website]
An amateur game programmed for the Coco3 by Mike Snyder, and split into four parts: Escape From Ru, The Island Search, Iron City and Planet of Destruction.
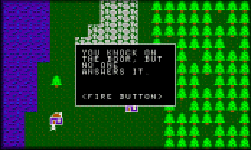

1991 – Hugo II: Whodunit? (aka Hugo’s Mystery Adventure

PC MSDOS (disc or download)
Programmer: David P Gray (aka Gray Design Associates) [website]

The sequel to the cult game Hugo is an interactive, addictive, adventure with fun (and tricky) puzzles. And a Dalek!
Penelope’s Uncle has been murdered and Hugo has disappeared. Take control of Penelope as she tries to solve the case in this puzzle game. The manual has this to say:
It’s adventure time again as HUGO and Penelope get swept up in another superbly animated 3D EGA extravaganza! This time a murder mystery is afoot with a couple of fiendish twists and a large helping of humor along the way. Just look what’s in store; a revolving bookcase, a saucey French maid, and a murderer !! HUGO II, WHODUNIT? follows the same look and feel of HUGO’S HOUSE OF HORRORS but with many more screens and characters. If you enjoyed the original HUGO adventure, HUGO II is a real treat in store for you!
At one point, Penelope makes a call from a phone box and is transported to an alien world where she meets the Doctor and is given his sonar screwdriver.
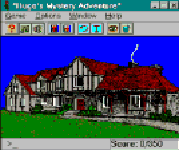
Hugo II: Whodunit?, programmed and released by David Gray (above right), was retitled in 2000 to make up part of The Hugo Trilogy for Windows, a shareware package containing Hugo’s Horrific Adventure, Hugo’s Mystery Adventure and Hugo’s Amazon Adventure, all of which were retitled from the original Hugo, Hugo II and Hugo III, along with being enhanced for Windows (see grab left). The trilogy costs $10 and is available from the website. The original MSDOS games have since been deleted, but thanks to the generosity of Gray, one of these is archived here at TME.
Controls
Enhanced type-in game
Conplete Walkthrough
You find yourself in the hallway. You must go upstairs and in the furthest door to the right where Penelope is waiting. Open the door and go inside. Penelope will feel tired an lie down. Meanwhile you should go over to the bookcase and pick up the yellow book. The bookcase will open and Hugo will disappear, you will now be playing a Penelope, who will wake up shortly. Let her look through the keyhole and watch Uncle Horace be murdered. Then you should also go over to the bookcase and pick up the yellow book.
You will now find yourself in the study where the gruesome act has just been committed. Speak to the parrot and look in the desk. You’ll find some matches so pick those up and try to use the telephone. You’ll get cut off so now get in the dumb waiter. You’ll find yourself downstairs in the kitchen now. Look in the cupboards and you’ll find a clove of Garlic, pick it up and head out into the garden.
In the garden you should head straight for the shed. The gardener in there will be very friendly and to scare him away you should eat the Garlic. There are four buttons on the table, they are red, blue, yellow and green. You will need to press both the green and blue buttons.
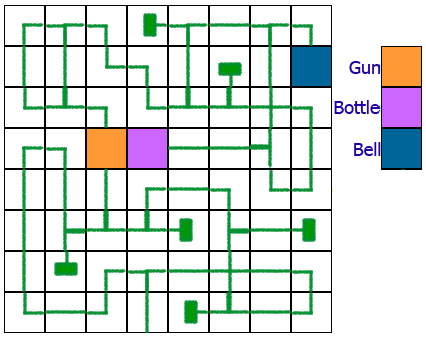
Head out of the shed and to the right. The gates should be open. Enter the maze, collect the bottle, gun and bell as shown below on the map (right).
Get back out of the maze and continue right through the garden. You’ve now got to get across the bridge, (it’s a good idea to save at this point) you need to get across without knocking the sides since this will cause Penelope to drop the matches, and you need these dry. Pick up the catnip before you cross the bridge.
Carry on past the bees, if the “bug snapper” is on (it should be if you pressed the green button, if not you’ll have to go back to the shed).
In the forest past the bees is the old man from “Hugo and the Haunted House”. When Penelope has finished with him continue right until the snake bites you. You should drink the Serum in the bottle to counteract this. Continue right and take the top path to where the dog is.
Throw the stick and the dog will run off leaving you to inspect the kennel. You’ll find some dynamite so pick it up and carry on to the right.
Go through the gate here and turn left and walk past the telephone box. When your in the street read the writing on the wall. It should say “1-800-333-Hugo” Now go back to the telephone box and step inside. Penelope will automatically phone the police, but after you can dial the number above.
Once you arrive in the new world you should shoot the Dalek with your gun. The Doctor will thank you and give you a sonar-screwdriver. Now get back in the telephone box.
Go back to where the old man is and take the path down. Here you’ll find a well. Climb down the rope into the well and place the dynamite near the rockfall. Light the dynamite and climb back up the rope very quickly (this is another good save point since if you’re not quick enough up the rope you’ll be killed by the blast.)
When all is clear you can climb back down into the well. You’ll walk through into an entrance to a number of caves. Take the left cave and collect the lamp at the end of it. Then come back and go through the middle cave. You’ll need to get across the cavern to get the rotten banana.
You can’t see it but there is a hidden ledge behind the rocks at the bottom of the screen. If you travel to the very bottom of the screen and then cross you shouldn’t fall into the hole. Get the banana and return to the entrance of the caves and take the right hand entrance.
At the end of this cave is a trapdoor. You’ll need to wake the genie in your lamp and then feed him the rotten banana so he’ll open the door for you. You’ll find yourself back in Uncle Horace’s house.
Use the sonar-screwdriver to open the safe. You won’t be able to read the will unless you’ve got the magnifying glass. (to get the magnifying glass you’ll need to turn left out of the kitchen doors and then weave you’re way through a maze of deadly venus fly traps).
However the will simply says that Uncle Horace has left the majority of his wealth to Hugo.
Go to the top of the house and open the door on the left. Aunt Hester is in here. Accept her offer of wine and whilst her back is turned read the paper on the table. You only get one chance at this.
Now go next door and speak to Harry. He will just laugh and laugh and laugh, so not much to do here.
Now go back down the corridor and into the room on the right where the maid is, this is the parlour. Speak to her for a while and then go into the kitchen (left) speak to the cook and then go back into the parlour and into the room to the right with the chimney in it. Now rub the bell with the catnip and then give the bell to the cat.
Leave the room and the cat will ring the bell. The maid will leave you alone and you can look in the cupboard to see what she was hiding. Pick up the photo album and look at it.
Return to the lounge where you should see the police inspector just going in. He will ask you who the murderer was.
Harry is the murderer.
You will find you are now Hugo. To get out of the looked room you should first pick up the paper and pencil.
Push the paper under the door and then push the pencil through the keyhole. The key will drop onto the paper below and Hugo will be free.
Download
BACKUP FILE IS 0 BYTES – SEARCH WEB FOR ORIGINAL
This is the original MSDOS version which is no longer available. Gray Design Associates have graciously allowed TME to continue distribution of it, but please remember that this is Shareware and, should you choose to keep it, you should download the official release from the website. Gray Design Associates also wish to point out that there no use of copyrighted names or characters from the BBC TV series Doctor Who appear in Hugo II: Whodunit, and that any resemblance is purely coincidental.
1991 – Brides of Dracula

Commodore Amiga (and possibly C64) (Disc)
Publisher: Gonzo Games
Programmers: Eddie Haynes, Greg Modern, Alan Botwright and Mark Hill
Graphics: Jason Green
Music: George Wilkons
Commodore Format reported in 1991 that the C64 release of this game featured a Victorian house with Daleks in the dungeon, a clear homage to The Evil of the Daleks.
The C64 version does not appear to have ever been released, however the Amiga version was, and included the Daleks.
1992 – The Bod Squad
Commodore C64 (Cassette)
Publisher: Zeppelin Games
Programmers: Vision Works
Coding and Graphics: Kent Murray
Music and FX: Kev Bruce
A green alien blob loses his family and must search for them across different time and places on Earth, in this hilarious cartoony puzzler. To do this, he uses a time machine that looks worryingly like a TARDIS (as seen flying through space in the opening sequence and static at the start of each of the three levels). At the end, however, the time machine is hit by a meteorite, and the children are scattered once more, paving the way for a (non-existent) sequel.
Commodore Format magazine featured a demo with around 1/3 of the Egypt level (scan of original tape on the right), although in an effort to regain some political correctness (the game’s title sounding very much like a derogatory reference to Jehovah’s Witnesses) the tape inlay read Bod the Alien.

Controls
Joystick: Up (Jump), Down (Crouch, ready for high jump), Left/Right (directions), Fire (flick switch, or with l/r, throw bombs).
Cheats
Some ROMs available online have been hacked, offering infinite lives, energy, time and the following extra controls in-game:
CBM-Key: Skip level
Space: Fast Bod
CTRL: Normal speed Bod
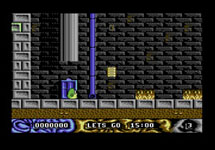
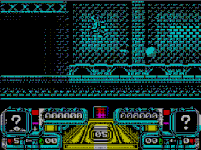
1992/3 – Dalek Attack

(Doctor Who Magazine press announcement)


Atari ST, Commodore Amiga, PC MSDOS (1992 Disc, reissued 1995)
ZX Spectrum 48K, Commodore C64, Amstrad CPC464 [cancelled at the last minute] (1993 Cassette)
Publisher: Admiral Software (1995 reissue by React – also reissued as part of The Sci-Fi Collection) [website – PC and Amiga versions still available]
Producer: RD Hulley
Original Idea and Storyboard: RD Hulley
Game Design and Additional Storyboard: 221b Software Development
Development Manager: Chris Price
Graphics: John Gyarmati and Wayne Dalton
Music: Paul Tankard
Programmer: Richard Turner (Atari ST and Commodore Amiga), Nick Kimberley (PC, Spectrum 48k, Amstrad CPC464), Jason Heggie (Commodore C64)
A platform shoot-em-up, as was popular at the time (especially for TV and film licenses), in which the player can choose to play as the second, fourth or seventh Doctor and a friend has the option to join them as either Ace or a UNIT soldier (except in the 1993 releases, in which play was limited to the seventh Doctor and Ace). The gameplay is based around the tenuous premise that Davros is leading the Daleks to invade earth and the Doctor (sent by the Time Lords, who help out occasionally, but again not in the 1993 releases) must jump around various cities shooting them with some kind of lazer gun. K9 is also at hand to help (yet again, not in the 1993 releases) and after several Earth-levels (in the sewers, London, Paris, New York and Tokyo), the Doctor goes to Skaro.
The game received extensive coverage in Your Sinclair, being as it was one of the final games destined to be released on a format that all but died within the next two years.
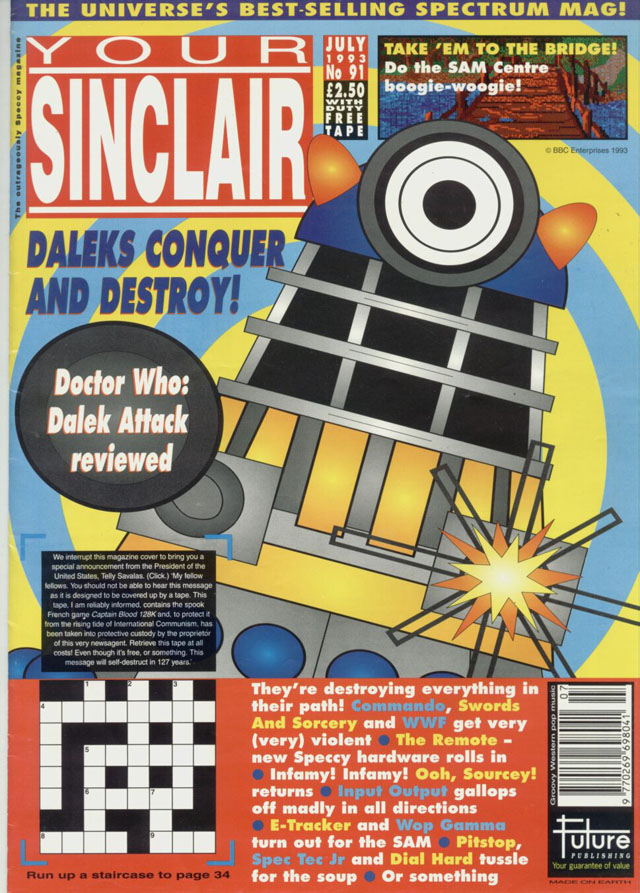

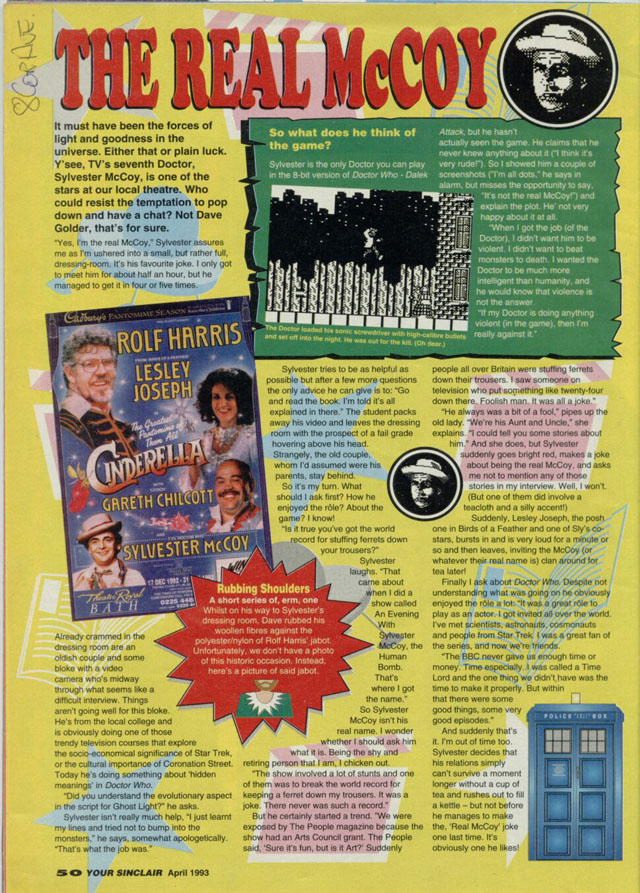

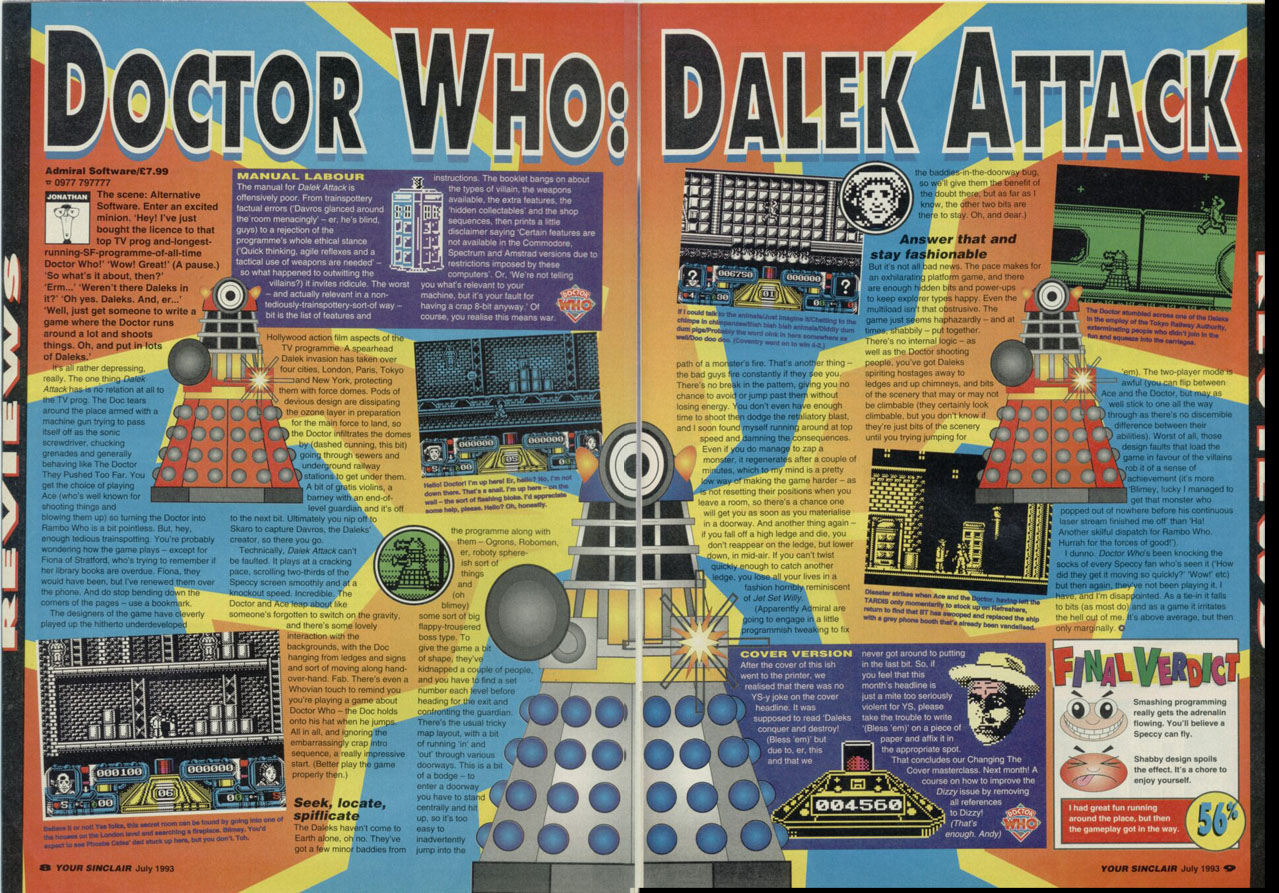
(Note that the grab in the ‘Real McCoy’ feature is of a location not included in the finished game.)
The booklet opened with a story, reprinted below (including any grammatical errors), before going on to describe locations, the screen layout, characters and weaponry, loading instructions and controls (details of these are also below, but not direct reprints).
The inhabitants of Earth had been blissfully unaware that from the depths of outer space, their progress was being carefully scrutinised by the evil leader of the most ruthless, vicious and technically advanced race in the universe.
Davros’s knarled and twisted fingers switched on the intercom “Battle Commander Daleks report to the main control room!” he croaked.
The twelve Battle Commander Daleks glided into the main control room in the presence of Davros and the Emporer Dalek.
Davros glanced around the room menacingly, “How is the war with the Ginorms proceeding?” he shoted. “All but a few have been exterminated. Universe Sector Zeep 3 is now ours” replied the Emporer.
“Excellent! Excellent! Excellent!” screeched Davros. “Now is the time to invade and conquer Universe Sector Solar 1, we will start with the planet Earth which is infested with the friends of that meddlesome Timelord, the Doctor.”
“We will launch the Battle Fleet on your command Davros” replied the Emporer.
“Then let it be,” snarled Davros, “Exterminate all humans!” “Exterminate! Exterminate! EXTERMINATE!” cried the Battle Commander Daleks.
On the planet Gallifrey, there is a meeting of the High Council of the Timelords. “The Daleks have conquered most of the Universe, their reign of terror must be stopped,” speaks the President of the High Council “to this end, Doctor, we are instructing you to go to the planet Earth and put a halt to this madness. We will offer you every assistance possible. Good luck!”

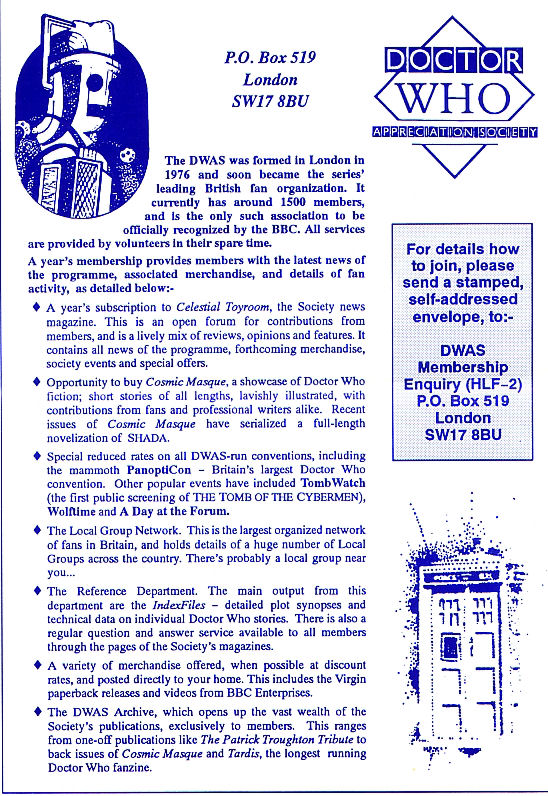
The original release also contained a flyer inviting the young gamer to join DWAS (see above) and also a sticker proudly proclaiming “I’ve been exterminated!” (also see above).
Controls
Joystick:
UP – move up (in sewer), jump up, climb up, grab ledge (while jumping) or go through door.
DOWN – move down (in sewer), crouch, drop, climb down, search object.
LEFT – slow down (in sewer), move/face left.
RIGHT – speed up (in sewer), move/face right.
FIRE – fire current weapon or (held down) smart bomb/grenades.
Keyboard :
F7 – Pause (Commodore C64)
F10 – Pause (Amiga/Atari ST)
Space – Change main player (16-bit versions only)
Esc – Quit (Amiga/Atari ST)
Restore – Quit (Commodore C64)
Notes :
The fire button will skip the opening sequences, and the “in sewer” notes do not count for the Spectrum version as it’s sewer level is a standard platformer which shares the controls of the other levels.
Cheats, Hints & Tips
Amiga
Type JAMES BOND AND OLIVER REED WERE NEVER GOOD SINGERS while holding down the shift key, after using a smart bomb in London, for everlasting life. This does not work if you fall from a great height.
Level jump passwords (only skip one at a time):
Paris DAY OF RECKONING (also works on PC)
New York THE SLYTHER (also works on PC)
Tokyo TRICOLOUR COFFEE SHOP
Skaro D5 GAMMA Z ALPHA
PC
Type TRUE I AM GUILTY OF INTERFERENCE JUST AS YOU ARE GUILTY OF FAILING TO USE YOUR GREAT POWERS for infinite lives.
Type ESCAPE SWITCH to make the border flash. We’re assured this is very useful.
Try the following :
A) Start a two-player game.
B) Switch controls during the sewer level (press F10 and then F3) then quit (press ESCAPE key twice).
C) Select the Doctor with the companion’s controls (use the arrows).
D) Start the game again and once the sewer has loaded switch the players controls back.
E) When you reach London the companion should appear with 0 (ie infinite) lives. The Doctor will not be invulnerable himself though.
Or, for similar results: A) Start a two-player game.
B) During the sewer level, quit (ESCAPE) and restart the game.
C) This time, select the Doctor and Companion, but only send the Doctor to the TARDIS.
D) Play the sewer level alone.
E) You will meet the companion in London who will be invincible. Again, though, the Doctor will not be.
Commodore C64
During the game, hold both shift keys down, then press and hold P. Whilst pressing all three keys, tap asterisk to skip the level.
Downloads
Instruction Manual
1992 – The Key to Time
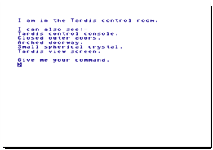
AdvSys [Platform Independent Interpreter] (Disc)
Programmer: Jon Drukman
Having received a message in the middle of the night, the player goes to find the Key to Time and return it to the White Guardian, armed only with a TARDIS � leading to a (very short) quirky adventure game. If you’re getting those kind of messages in the middle of the night you’re drinking something good…
Controls
Type-in game
Solution
Out, N, B, Get coin, Throw coin through laser bars, U, Get shovel, Break shovel, D, S, E, Light pole with globe, W, W, Open chest, Get Alcohol, E, NE, Clean plastic with alcohol, Push button, SW, E, Get cups, W, N, U, NE, Climb monolith, Get key, D, SW, D, S, NW, Examine gate, Slide card through slot, W, Enter box, Examine controls, Push button, Out, Give key to old man.
1992 – Overkill

PC MSDOS (disc)
Publisher: Epic Megagames, in association with Precision Software Publishing, now know as Epic Games [website]
Developed by: Tech-Noir
See also Epic Classics, which is in no way affiliated with Epic Games, but sells the original products
An excellent DOS-based shoot-em-up with a guest appearance by the planet Gallifrey. The game features some well composed VGA graphics and an addictive soundtrack coming via both the sound card and the PC speaker – the storyline is printed in the instructions :
You arrive at your home planet after a long space flight, only to find it has been destroyed by a demonic warlike alien race that kills for sheer pleasure. You are now the last of your race and out for revenge.
Your single minded quest is to destroy the alien leader’s heavily armoured Battle Star at the end of planet 6. But before you reach the Battle Star you will have to battle your way through massive levels packed with danger, freeing six other planets from the tyranny of these creatures.
Some of the dangers you will face include meteor storms, space forts, hideous creatures and strange space ships of incredible power, piloted by aliens who will do anything to stop you.
Although you have limited fuel and weapons supplies, both can be collected on your long and perilous journey by picking up pods from the remains of alien crafts and creatures you have killed before reaching your ultimate goal.
If you are lucky you will have collected enough pods to have built the ultimate battle cruiser, a craft of immense fire power and capable of mass destruction, yet even this craft may not be enough when you reach the final battle ground.
The demo version features two levels (planets Edrax and Gallifrey, available from various DOS download sites such as dosgames.com), and the full version (available to buy, semi officially, from a site not affiliated with Epic Megagames) features six.
There are three versions of the demo in existence:
11/11/92: 2-level demo – starts on level one with difficulty set to “Holy Cow!”.
11/12/92: As above, but with added level/difficulty select.
21/09/93: Credit for PSP missing, just says “Episode One” (not “Episode One – This is Shareware”) beneath the title, “This is Shareware” appears where “Epic Megagames and PSP” should be, no “Fire = Start”. Level select still present.
Controls
Cursor keys : Move
Space : Fire
Tab : Select Weapon
Esc : Quit
Cheats
Type your name as NZL on the high score board for infinite lives (this cheat is printed in many places, but has yet to be verified by TME).
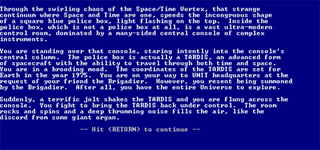
1993 – Beneath a Steel Sky


PC MSDOS, Amiga CD32 (CDRom), Commodore Amiga (Disc)
Publisher: Virgin Interactive / Revolution Software Ltd, in Association with Dave Gibbons
Game Design: Charles Cecil, Dave Cummins, Dan Marchant & Dave Gibbons
Script: Dave Cummins
V T System Concept: Charles Cecil, Tony Warriner, Dave Sykes and Dan Marchant
V T System Design: Tony Warriner
V T System 2.0 Implementation: Dave Sykes & Tony Warriner
Programming: David Sykes, Tony Warriner & James Long
Comic: Dave Gibbons
Backgrounds Screens: Dave Gibbons
Background paintings: Les Pace and Steve Ince
Computer graphics & animation: Stephen Oades, Adam Tween, Paul Humphreys & Steve Ince
Music: Dave Cummins
Music conversion & sound effects: Tony Williams
Quality Assurance: D. Marchant, J. Wright, P. Coppins, R. Hewison, A. Phelan, J. Martin
Assistant Producers: Aron Phelan, Peter Hickman
Manual: Noirin Carmody, Dave Cummins and Charles Cecil
Produced: Daniel Marchant
Directed: Charles Cecil
Packaging Design: Root Associates
Logistics: Catherine Spratt, Robert McGrath, Rosemarie Dalton, Riz Khan, Matthew Walker
A clever mystery game, produced with a working title of Beyond the Abyss, based on an engine very similar to LucasArt’s SCUMM (which had been used to create the Manic Mansion series amongst others) – so similar in fact, that in 2003 Revelation allowed the necessary files to be distributed freely for use with a SCUMM interpreter.
Background images were drawn by legendary comics illustrator Dave Gibbons. Dave, 44 at this point, had 20 years of experience behind him, including Superman, Batman, Dan Dare… and the first 69 issues of Doctor Who Weekly/Monthly (covering every strip up to and including Stars Fell on Stockbridge, except Timeslip). He also created a beautiful comic-book (see image below-left) which was packed with the game originally.
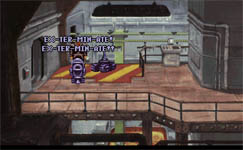
The player is Robert Foster, who is joined on his travels by Joey, a wise-cracking robot. Near the start of the game Joey is treated to a new shell, and to celebrate he does an impression of a Dalek.
Note that this game was designed by Gibbons in widescreen, but if playing directly in DOS mode, most VGA monitors will stretch vertically resulting in a distored image.

Controls
Mouse (use right click to use doors or objects, and to talk to people, left-click to find out more information)
Walkthrough – Section 0
Get RUNG on left side of walkway. Use RUNG on DOOR on right side of walkway.
Go WEST, back to the FACTORY. Go down the stairs, then go EAST.
Examine the robot SHELL in the junkpile south of the ELEVATOR.
Use the CIRCUIT BOARD in the SHELL.
Talk to JOEY. Examine the TRANSPORTER. Stand on ELEVATOR in middle of room.
When HOBBINS comes out to shut off the alarm, go EAST as soon as you can.
Quickly, before HOBBINS returns, do the following:
Open the CABINET on the north wall, near the floor. Take the WRENCH.
Talk to HOBBINS. Be sure to ask him about the ELEVATOR and the TRANSPORTER.
Go WEST. Tell JOEY to fix the TRANSPORTER.
When TRANSPORT ROBOT puts a barrel on the ELEVATOR, climb down the HOLE.
Wait for JOEY to fly in. Tell JOEY to open the DOOR.
Search REICH’S CORPSE. Talk to JOEY to wake him up. Go EAST.
Walthrough – Section 1
Find a LINC and see what you can find about REICH, using his SECURITY PASS.
Only use options 1-3.
Go into the FACTORY at the EAST end of the level.
Talk to ANITA until LAMB orders her to leave. Go EAST.
Put the WRENCH into the open space in the MACHINE where gears are visible.
Get the WRENCH again. Go SOUTHWEST (back the way you came).
Use WRENCH on WELDER. Ask JOEY how he would like a new shell.
At this point, as JOEY how he likes his new shell and he’ll do a Dalek impression.
Go EAST. Look through the WINDOW of the storeroom at the left of the screen.
Tell JOEY to investigate the STORES. When he comes back, ask him to report.
Tell JOEY to disable the FUSE BOX. When you hear a BZZT, enter the STORES.
Move the GANGWALK and get the small piece of PUTTY underneath. Go EAST.
(POTTS will search you. He won’t notice the PUTTY, but might take back some unimportant items).
Leave the FACTORY and go to the POWER PLANT on the WEST side of the level.
Use the WRENCH on both BUTTONS on the EAST side of the screen.
Tell JOEY to push one BUTTON, then push the other at the same time. (A PIPE will burst, and the OLD MAN will leave.)
Use the SWITCH on the machine with bars on it. Take the LIGHT BULB.
Put the PUTTY in the SOCKET where the LIGHT BULB was. Throw the SWITCH again. (The bars will blow open.)
Of the two SWITCHes that are now revealed, use the SWITCH that is pointing up.
Go to the ELEVATOR over to the West. Before you get in, tell JOEY to cut the CABLE on the EAST side of the screen.
Use LINC CARD on SLOT. Enter the ELEVATOR.
Walthrough – Section 2
Get the CABLE. Go WEST. Go NORTHEAST (the door beside the other ELEVATOR.)
Use the CARD on the left hand door and enter it. Move the PILLOW. Get the MAGAZINE under the PILLOW.
Leave the APARTMENT and the living area and go to the TRAVEL AGENCY on the EAST side of the ELEVATOR.
Talk to the AGENT until he schedules you for an ECONOMY TOUR.
Give the MAGAZINE to him, and take the TICKET that comes up from the desk.
Look for LAMB, the fat guy in the fur coat – he wanders between the FACTORY and his APARTMENT (next to REICH’S).
Give LAMB the TICKET. If you’re not already at LAMB’S FACTORY, go there and wait for him to show up.
Ask LAMB about the TOUR he promised you. Go EAST. Talk to ANITA, when she asks for your LINC CARD, give it her.
Then talk to her until there’s nothing more to talk about. Leave the FACTORY and wait for LAMB to appear.
Use the LINC TERMINAL. Choose the SECURITY SERVICES choice, D-LINC LAMB and freeze his assets.
Wait until LAMB tries to use the ELEVATOR. Ask LAMB if he has a problem. Offer to feed his CAT.
Go down a level to LAMB’S APARTMENT, next to REICH’S APARTMENT. Use your CARD to enter.
Get the VIDEOTAPE on the shelf. Look at it in the VCR if you want. Go to DR BURKE’S OFFICE on the WEST end of this level.
Talk to the RECEPTIONIST until she refuses to let you in. Ask JOEY to talk to her. Tell him to use his NATURAL CHARM.
Go WEST when the door opens. Talk to BURKE about a SCHRIEBMANN PORT. (Offer a lung, then a kidney, then your testes).
Ask BURKE how to get out of the CITY. (He should mention his WILLIE, who is ANCHOR the INSURANCE AGENT.)
Go to the INSURANCE OFFICE back by the TRAVEL AGENT. Ask JOEY to use the computer. (He should scramble the DRIVE.)
Ask ANCHOR about a SPECIAL POLICY. Tell him DR. BURKE sent you, not LAMB.
When he walks into the back, tell JOEY to use his WELDER on the STATUE. Get the ANCHOR when it comes loose.
Use the ANCHOR with the CABLE to form a GRAPPLING HOOK. Go back to HOBBINS’ FACTORY where you first started
Go out on the ledge where you escaped from the first SECURITY OFFICER. Use the HOOK on the big “S” SIGN
Don’t bother with the LOCKERS, the only one you can open is useless. Go EAST.
Use your CARD on the SLOT by the INTERFACE. Use the INTERFACE. Now you’re in LINC-SPACE. Get the BALL. Go EAST.
In the menu bar up top, use the OPEN program on the CARPET BAG. Get the MAGNIFYING GLASS and SURPRISE GIFT.
Use the DECRYPT program on the two DOCUMENTS with “?” on them.
Use the DECOMPRESS program on the COMPRESSED DATA. Go EAST.
Use the PASSWORDS (green and red swirls) to get to the DOOR on the NORTH side like this:
| A | B | C |
| D | E | F |
| G | H | I |
Use one of the passwords at G
Use a password at H
Pick up the password at G
Use a password at D
Move to E, then pick up the password at H
Use a password at E
Pick up the password at D
Move through A, B, E and F, then use a password at I
Move to F and C and take the exit NORTH
Get the BUST and BOOK. Use DECRYPT on the new DOCUMENT. DISCONNECT.
Use CARD on the TERMINAL at the right side of the screen. Go to SECURITY SERVICES menu again.
View all the DOCUMENTS. Use CARD in SLOT for ELEVATOR. Go out, and head down to BELLE VUE by the usual ELEVATOR.
Head WEST and go down the next ELEVATOR, using your ID CARD.
Walkthrough – Section 3
Go down to the GROUND LEVEL. When the large, old WOMAN walks by, talk to the GUARD (OFFICER BLUNT), then the WOMAN.
Go to the SOUTH side of the POOL, where the small SHACK is. Examine the DOOR and LOCK.
Use a LINC CARD on the LOCK. Enter the SHACK. Get the SECATEURS.
Go to the ST. JAMES CLUB entrance at the WEST side of the POOL. Talk to the DOORMAN.
Find MRS. PIERMONT and talk to her again; ask her to sponsor you.
Go to the APARTMENT ENTRANCE at the EAST side of the POOL.
Talk to the GARDENER about the FLOWERS. Ask the BOY about DANDELIONS. Talk to the GARDENER again.
Use the INTERCOM next to the ELEVATOR. Talk to PIERMONT for however long you want, then ask her about the CLUB.
When she gets up to call the CLUB, put the VIDEOTAPE in the VCR.
When SPUNKY starts barking at the MONITOR, go examine the BOWL he was eating from. Get some DOG BISCUITS.
Leave the APARTMENT. Go back to where the BRICKS and PLANK are. Put the DOG BISCUITS on the PLANK.
Enter ST. JAMES CLUB. The BAND is probably playing; just talk to everyone for a while, then leave.
When you hear barking, SPUNKY has found his food. Use the ROPE to launch SPUNKY into the POOL.
When BLUNT goes to help PIERMONT, enter the CATHEDRAL. Examine the DUMMIES. Enter the MIDDLE DOOR.
Open the LOCKERS and examine what you find there. You find ANITA.
Go back to the top level, enter the FACTORY and go where you last saw ANITA alive.
Open the middle LOCKER and wear the OVERALLS (RADIATION SUIT). Go EAST into the REACTOR LOBBY.
Use the CONSOLE. Open the REACTOR DOOR. Enter the REACTOR DOOR. Get the LINC CARD. Exit the REACTOR.
Use the CONSOLE. Close the REACTOR DOOR. Exit the REACTOR LOBBY. Wear your COAT again.
Enter the SECURITY SERVICES OFFICE. Use REICH’S CARD on the ELEVATOR SLOT.
Use ANITA’S CARD on the INTERFACE SLOT. Use the INTERFACE. You’re in LINC-SPACE again.
As quickly as possible:
Use the BLIND program on the EYE. Go EAST. BLIND this EYE as well. Go NORTH.
Ignore the CRUSADER for now and go NORTH again. Leave the WELL alone for now and go EAST.
Get the TUNING FORK if the EYE is still blinded.
Now you can slow down again.
Go WEST. Use the PLAYBACK program (projector) on the WELL. DISCONNECT.
Exit the SECURITY SERVICES building and return to GROUND LEVEL.
Talk to the “GARDENER” again. He is EDUARDO. He’ll tell you about the VIRUS that ANITA was supposed to retrieve.
Go into the COURTHOUSE next to ST. JAMES CLUB. Defend HOBBINS; he should get two hours community service.
Go back to ST. JAMES CLUB. The BAND should be gone now; if so, use the JUKEBOX. Pick any song you want.
Eventually, COLSTON will get up to change your choice; when he does, grab his GLASS.
Go back up a level to DR. BURKE’S OFFICE. Give the GLASS to BURKE. You should now have COLSTON’S fingerprints.
Return to the CLUB. Use the METAL PLATE just to the right of the STAGE.
Use the CROWBAR on the PACKING CASE. Get the LID and use it on the smaller BOX.
Stand on the BOX and use the METAL BAR on the GRILL. Use the SECATEURS to remove the GRILL completely.
Enter the NARROW PASSAGE. Go EAST, then NORTHEAST, then EAST.
There should be a large HOLE near the EAST side of the screen here. Use the LIGHT BULB in the SOCKET to the left of the HOLE.
Go EAST. Now is a good time to save your game! Go EAST.
Walkthrough – Section 4
Run quickly down through the screen – if you get hit, try again (hence the recent save we recommended!)
Use the METAL BAR on the PLASTER behind the VEIN, and then on the BRICKWORK exposed. Get the BRICK.
Drive the METAL BAR into the SWELLING of the VEIN. Use the BRICK on the METAL BAR. When the ROBOT enters, go EAST.
Go NORTH. Use the CONTROL UNIT on the EAST side of the room. Reduce the temperature.
Stand on the APERATURE (which should be nearly closed) and pull the METAL BAR above..
Go WEST. Look through the GRILL on the wall to see the TANK ROOM. Go EAST twice.
Use the CIRCUIT BOARD in the MEDICAL ROBOT. Tell JOEY to check out the TANK ROOM.
When he returns, ask him to report. Ask him about everything you can, but especially the NUTRIENT TANK.
Tell JOEY to open the TAP on the NUTRIENT TANK. When you hear dripping, enter the TANK ROOM.
The ANDROID should go to shut off the tap and fall through the GRATE.
Go NORTHEAST twice. You should end up in a MONITORING ROOM where there is another LINC INTERFACE.
Use REICH’S CARD on the TERMINAL near the entrance DOOR. Choose ACCESS TO RESTRICTED AREA: OPEN DOOR.
Go WEST. Gallagher should confront you. Search the CORPSE for a CARD and search JOEY for the CIRCUIT BOARD.
Go NORTHEAST. Use the RED CARD in the INTERFACE SLOT at the lower-left of the screen. Use the INTERFACE.
Walkthrough – Section 5
Go EAST. BLIND the EYE and go NORTH quickly. Use the DIVINE WRATH program on the CRUSADER. DISCONNECT.
Use ANITA’S CARD on the SLOT and use the INTERFACE again.
Go EAST. BLIND the EYE and go NORTH quickly. Go EAST through the door the CRUSADER was guarding.
Use the OSCILLATOR program (TUNING FORK) on the CRYSTAL. Get the HELIX (VIRUS). The VIRUS is now on ANITA’S CARD.
DISCONNECT.
Go WEST then SOUTHEAST.
Use ANITA’S CARD on the CONSOLE in the middle of the NORTH wall. Get the TONGS hanging next to the EAST DOOR.
Use the TONGS on the TANK full of FLESH BITS. Use the TONGS AND FLESH on the FROZEN TANK. Go EAST.
Open the CABINET next to the MIDDLE ANDROID. Put the CIRCUIT BOARD in the CABINET.
Use the CONSOLE above the CABINET. Choose DOWNLOAD CHARACTER DATA and then RUN STARTUP PROGRAM.
Talk to JOEY/KEN. Go EAST. Tell KEN to put his HAND on the PANEL. Put your HAND on the other PANEL.
Go EAST twice. Tie the CABLE to the PIPE SUPPORT. Climb down the RUNGS. Use the FROZEN FLESH with the ORIFICE.
Swing over to the newly-visible DOOR using the CABLE.
Walkthrough – Section 6
Tell KEN to sit in the chair.
Controls
Mouse. Press CTRL-G to speed up or slow down the game, too – especially handy when you’re waiting for someone or something!
Tips
If playing on a PC, press CTRL and D to enter the debugger, then type showgrid and press escape. This shows roughly where the characters can walk and what they can interact with (along with some messages from the programmers). This has been known to crash the system, as it’s not a feature meant for public consumption. Use the same process to turn the gridlines off.
Another debug feature is available if you type the name of the section as referred to in the walkthrough above (eg “section 3”), which will skip you to that part of the game. Again this is meant for debugging purposes and can crash the program and note that in section 5, you’re started without the vital tuning fork.
Download
Beneath a Steel Sky (without voice effects – a larger version is available elsewhere online with talking).
Play using ScummVM.
Note that the current license holders have licensed this game for Freeware distribution. TME recognises this in hosting this file.
1993 – Doctor Who and the Daleks
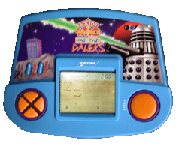

Handheld LCD game
Released by: Systema
A handheld LCD game, distributed exclusively by Burton’s books, and based on the popular arcade game Frogger.
In the game, you control the TARDIS (using the 4 cursor buttons – slightly simpler than the real thing, we imagine), and have to hop on a number of moving wibbly things (time-streams, we imagine) to try and land the TARDIS in four different locations, from prehistoric dinosaur-land, to futuristic utopia. In later levels, the Daleks try and touch the TARDIS, which kills it.
Making very little sense, this is essentially a Frogger game with some Doctor Who related graphics.
1994 – The Pyramids of Mars
PC MSDOS (download)
Programmer: Patrick Wigfull [website]
A popular type in game based on the story of the same name. Patrick would later code the equally popular Return To Karn.
Controls
Type-in game
Review by Steven Jenkins for Velvet Web
This is a slightly unusual review, because it is about a non-commercial computer program (IBM PC) available over the World Wide Web. The program in question is a text-only adventure game based around the events of the classic Dr Who story The Pyramids of Mars. For those unfamiliar with the original plot, the story revolves around the attempts of an evil superbeing, Sutekh the Destroyer, to free himself from the prison in which he was trapped thousands of years ago by his brother Horus.
In case you haven’t guessed from the names, these powerful beings, from the race known as Osirans, were once revered as the Egyptian gods, and so it is no surprise that their technology has a distinct pyramid motif and that their robot servants bear an uncanny resemblance to Egyptian mummies.
In the original show the Doctor, played by Tom Baker, was ably assisted by Elisabeth Sladen as Sarah Jane Smith. Patrick Wigfull, who wrote the game, has sensibly avoided including her, but nevertheless remains fairly true to the storyline. In fact, I have some doubts whether it would be possible to complete this game without prior detailed knowledge of what to do at each point. Maybe I’m just no good at games like this, but I’m finding it hard enough, halfway through, even with access to the video.
Of course, as a text-only adventure the game cannot hope to compete with commercial graphical adventures, and having only limited experience of the genre myself I find it hard to comment on its merits when compared to other text-only adventures. However, as a Dr Who fan I must say that I enjoyed playing it and feel that considerable time and effort must have gone into distilling the essence of the TV original into a form suitable for a game.
Unfortunately, the problem with converting a TV show into a computer game is that you lose the performances of the artists. Additionally, the TV-version of Pyramids was greatly enhanced by its period (1911) setting and spooky atmosphere. In this case, however, the plot is strong enough to generate its own atmosphere, with the help of a little imagination on the part of the player.
In my opinion its well worth a look.
Complete Solution
Get device, pull lever, exit
W, N, E, Pull cord, W, S, S, S, S, S, S, S, E, E, E, E, N, N, W, S
Examine photo, examine Laurence, ask Laurence about machine, ask Laurence about priory, ask Laurence about poacher, ask Laurence about Marcus, ask Laurence about Namin, get printout, read it, drop it, N, N, N, W, W, W, N, N, E
Examine body, E, E
W, S, E, examine case, examine portrait, examine jacket, examine scarf, examine sonic, examine device, examine TARDIS, examine hat, drop it, get key, W, N, E, E, S, look in window, examine window, N, W, examine mummy, W, S, E, E
Examine chest, unlock chest with key, open chest, search Namin, save, get rifle, get ring, E
Examine temple, examine sarcophagus, examine wall, examine organ, play organ, W, W, enter TARDIS
Examine instruments, examine scanner, examine computer, type Mars on keyboard, type Egypt on keyboard, type Earth on keyboard, type Priory on keyboard, type Pyramid on keyboard, type mummy on keyboard, type Sutekh on keyboard, type Osiris on keyboard, type Horus on keyboard, type eye on keyboard, type TARDIS on keyboard, type Gallifrey on keyboard, type Timelord on keyboard, type Sonic on keyboard, exit, W, S, E
Examine rifle, examine ring, wear ring, E, enter pyramid.
Examine urn, save, get pack, exit, W, W
Drop ring, examine pack, examine key (wait for another scream at move 122), S
(Now find the poacher’s body – this is in a random place), examine body, drop brass key, get iron key
(Now go back to the urn – from the garden this is S, S, E, E, E, E), turn off urn, save, E, E
Unlock shed with iron, open shed, drop iron, enter
Get all, load rifle, exit, W, W, W, W, W, W, N, N, N, E
Pry case, save, drop bar, get wrappings, W, S, E, load rifle, wear wrappings, E
Put gelignite on ramp, W
Shoot gelignite, save, drop wrappings, drop rifle, W, N, E, enter
Type ferret on keyboard, exit, W, S, S, S, S, S, S, E, E, E
(Wait until move 200), look in window, E, N, N, W, S
Get glass, N, N, N, W, W, W, W, N, E, E, E
Examine wall with glass, save, examine patch, push patch, S
Save, drop glass, get matches, N
Push lodestone, enter vortex
Open chest, get bomb, save, E, save, W, W
Get hat, get circuit, turn on circuit, save, enter
Pull lever, push button, pull lever, exit
(Some rooms in this maze have dead end rooms that will force you to quit. Follow the ferret – write down the directions to the Chamber of Light by following him, then reverse them to find the way out)
Drop cage, open cage, save, N, N, W, N, N, E, N, E, E, N, N, W, W, W, W, N
Drop bomb, turn it on, S
Wait, N, save, get key, S, E, E, E, E, S, S, W, W, S, W, S, S, E, S, S
Enter, pull lever, push button, pull lever, exit
Open cabinet with key, get stick, E, E
Light match, light dynamite, throw dynamite into vortex, save, W, W
Enter
Pull lever
1994 – Whovial Pursuit
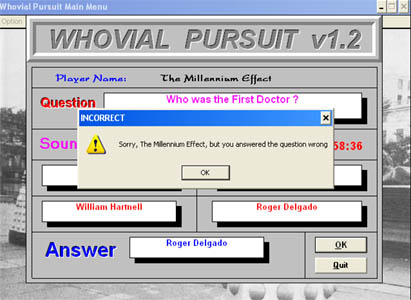
PC Windows (download)
Programmer: Brian Copeland
A bit misleading this one, since it’s not based on Trivial Pursuit at all, but rather is a series of multiple choice questions (although with no randomiser built in, it’s pretty easy to run the questions twice through and get them all right the second time round). Most are easy, except one about the author’s birthday and one about his personal most hated serial which shows up the amateur nature of this, and a number which are possible, but just too diffcult (the sort of level of “What was the sandwich filling in the sarnie the Brig ate in Terror of the Autons“). The game is full of fun soundbites (which do tire after a while), and at the end the percentage is added up and you are given a rating.
Controls
Mouse
Cheats
The percentage is based on how many questions you’ve answered before you finish OR quit. So, get question #1 right and then quit, and you’ll get 100% – “A true Whovian” apparently. A quick hint – it isn’t Roger Degado.